Ever started painting a wall only to realize your lines are crooked, your pattern’s off-center, or your stencil slipped? You’re not alone. Before you grab a roller and dive into color, the real work happens with pencil, chalk, or tape. What you use to draw on walls before painting isn’t just a suggestion-it’s the foundation of a professional-looking finish.
Why Sketching Before Painting Matters
Painting over a blank wall without planning is like baking a cake without a recipe. You might end up with something edible, but it won’t look intentional. Whether you’re hanging wallpaper, creating a geometric accent wall, or painting a mural, marking your surface first saves time, reduces mistakes, and cuts down on paint waste.Most DIYers skip this step because they think it’s extra work. But here’s the truth: the extra 20 minutes you spend sketching saves you hours of fixing crooked lines, touching up bleed-throughs, or repainting entire sections. A clean, precise edge starts with a clean, precise mark.
Chalk Lines: The Pro’s Secret for Long Straight Lines
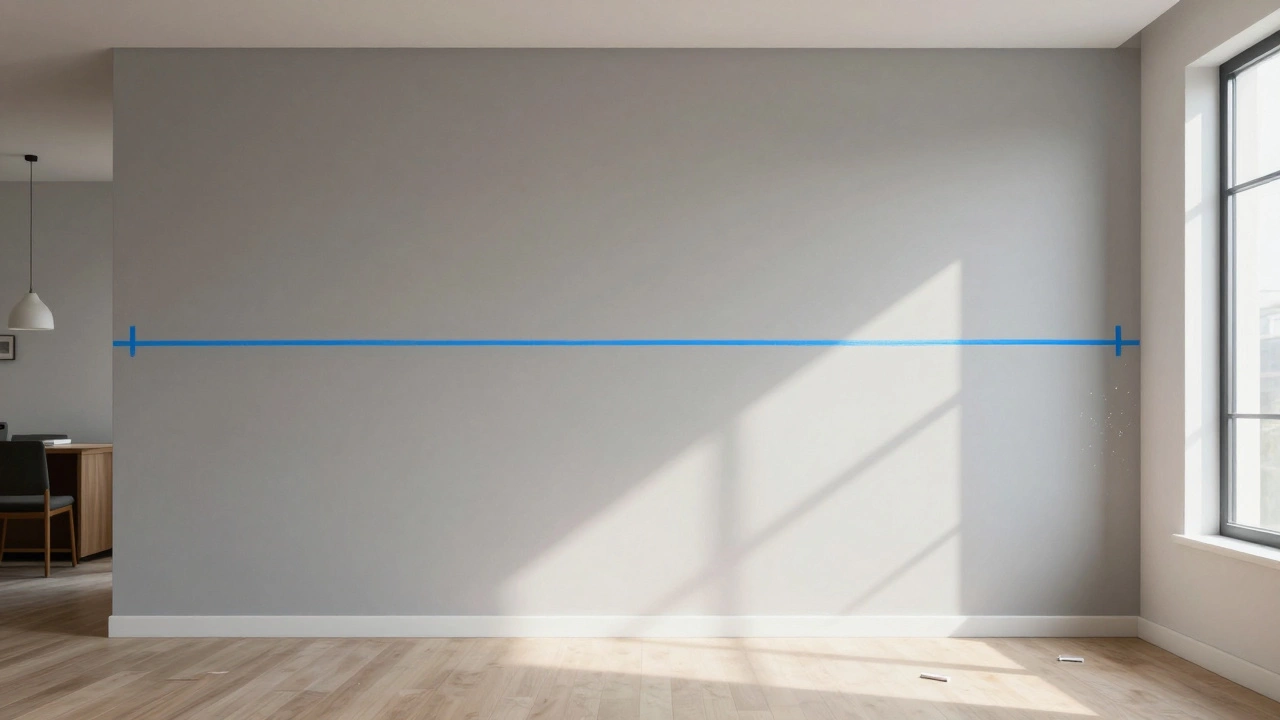
If you’re working on a large wall and need a perfectly straight line-like for baseboards, crown molding, or dividing sections-chalk line is your best friend. It’s a simple tool: a spool of string soaked in colored chalk powder. You stretch it across the wall, snap it, and it leaves a crisp, visible line.Chalk lines work because they’re tension-based. Unlike a ruler that can wobble or a freehand mark that drifts, the string stays tight and true. Professionals use it for everything from laying tile to hanging drywall. For wall art, it’s perfect for creating grids, symmetrical patterns, or aligning multiple panels.
Pro tip: Use blue chalk for light walls and white or yellow for dark ones. The color matters-some chalks fade fast or leave stains. Always test on a small hidden spot first.
Painter’s Tape: Precision for Sharp Edges
Painter’s tape isn’t just for protecting trim. When used right, it becomes your drawing tool. Before painting a stripe, border, or geometric shape, apply the tape to the wall. Then, use a utility knife or credit card to press the edge down firmly. This seals the tape to the surface, preventing paint bleed.Here’s how to turn tape into a guide: Lay down your tape where you want the edge to be. Then, lightly trace along the top edge with a pencil or fine-tip marker. Remove the tape, and you’ve got a clean, repeatable outline. This works especially well for complex shapes like hexagons or chevrons.
Not all tape is equal. 3M ScotchBlue and FrogTape are the top choices because they’re designed for delicate surfaces and hold up during multi-day projects. Avoid cheap hardware store tape-it curls, peels, and leaves gunk behind.
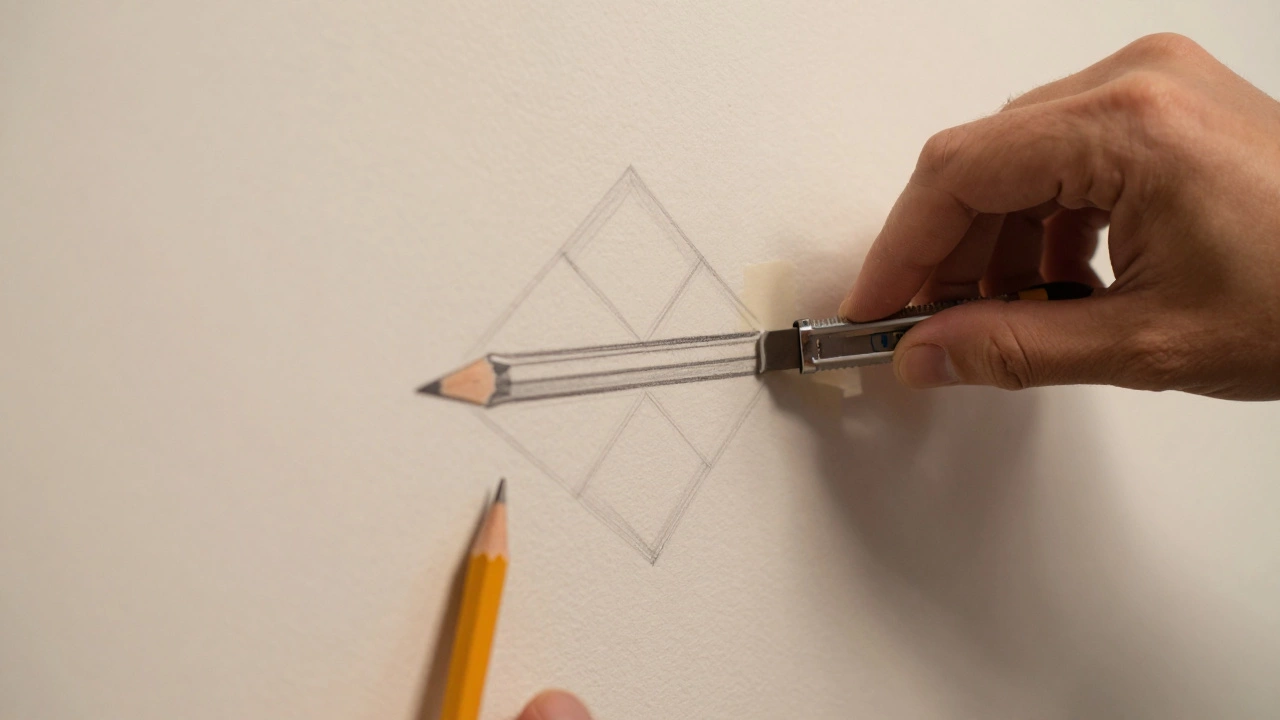
Pencils and Fine-Tip Markers: For Detailed Work
For intricate designs-like murals, stencils, or freehand sketches-a pencil is your go-to. Use a soft lead pencil (2B or 4B) so it marks clearly but wipes off easily. Harder pencils (like 2H) don’t show up well on textured walls.For darker walls, try a white grease pencil or a china marker. These are oil-based and show up on almost any surface. Artists who paint murals often use them to outline large sections before applying paint.
Some people reach for permanent markers. Don’t. Even if you think you’ll wipe it off, ink can seep into drywall pores and leave ghost lines after painting. If you must use a marker, choose a water-soluble one like Staedtler Lumocolor. Test it on a scrap piece of drywall first.
Stencils and Projectors: For Repeating Patterns
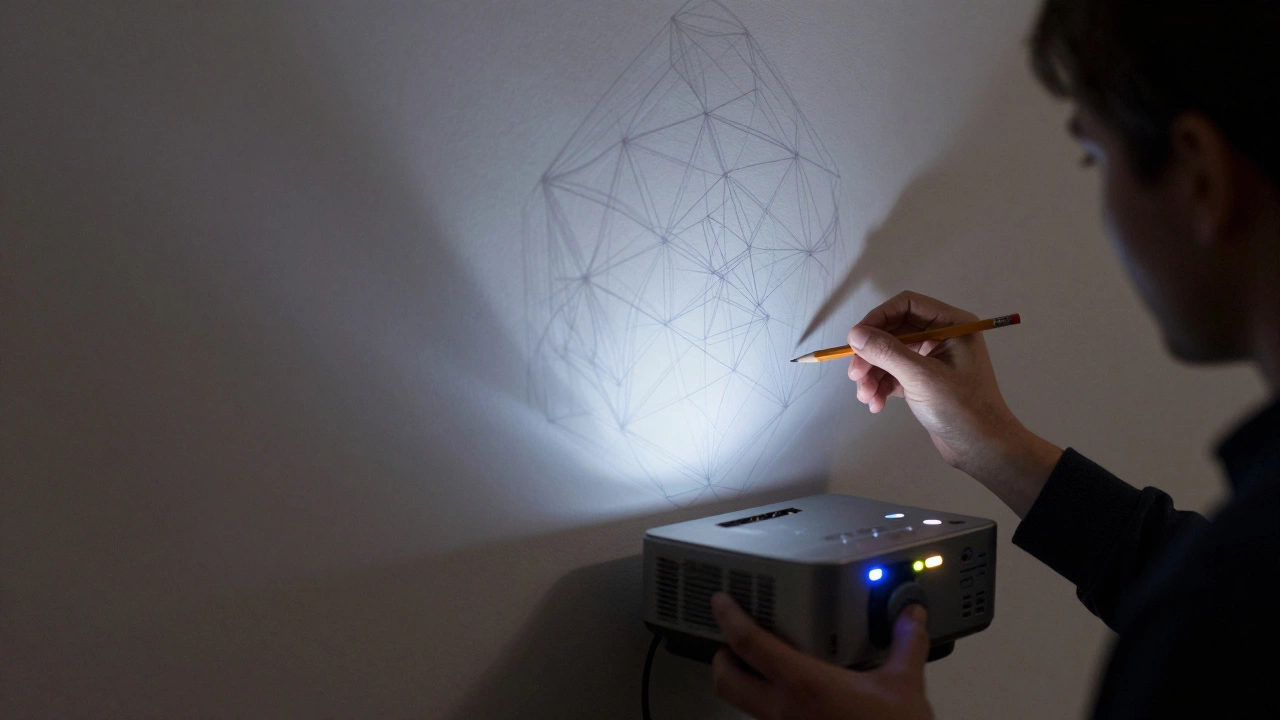
If you’re doing the same shape over and over-dots, leaves, stars-you don’t want to trace each one by hand. That’s where stencils come in. Use plastic or mylar stencils with adhesive backing. Press them flat, then dab paint with a stippling brush, not a roller. Too much paint? It’ll bleed under the edges.For large murals or detailed artwork, a digital projector is a game-changer. You can upload your design to a projector, cast it onto the wall, and trace the outline. This is how professional muralists work. You don’t need a fancy model-a $100 portable projector from Amazon does the job. Just make sure your wall is clean and flat, or the image will warp.
What NOT to Use
Some shortcuts look tempting but ruin more than they help:- Regular pens or markers - They stain drywall and won’t wash off.
- Charcoal or pastels - They smear, dust off, and mix with paint.
- Wet erase markers - They don’t show up well on porous surfaces and fade too fast.
- Measuring tape alone - You need to transfer measurements into visible lines. Tape gives you length, but chalk or pencil gives you sight.
Step-by-Step: How to Mark Your Wall Before Painting
Here’s a simple workflow that works for most projects:- Clear the room. Remove furniture or cover it with drop cloths.
- Clean the wall. Dust and grease ruin adhesion for tape and chalk.
- Measure and mark key points. Use a level and measuring tape to find center lines, corners, or repeating intervals.
- Use a chalk line for long, straight guides. Snap two or three lines to create a grid if needed.
- Apply painter’s tape for sharp edges. Press down firmly along the entire length.
- For detailed art, lightly sketch with a 2B pencil or white grease pencil.
- Double-check everything with a level or ruler before you start painting.
Take a photo of your marked wall before you paint. That way, if you lose your lines while painting, you’ve got a reference.
Real-World Example: Painting a Geometric Accent Wall
Last fall, a client in Vancouver wanted a diamond pattern on their living room wall. The design had 12 repeating diamonds, each 18 inches wide. Without marking, it would’ve looked messy.We started with a chalk line down the center of the wall. Then we measured 9 inches left and right, snapped another line. We repeated that pattern across the entire wall, creating a grid of 18-inch squares. Inside each square, we drew diagonal lines with a pencil to form diamonds.
Then we used FrogTape along the pencil lines. We painted the diamonds gray, let it dry, then peeled the tape. The result? Crisp, clean lines that looked like they were done by a pro. No touch-ups. No regrets.
Final Tip: Test Your Method First
Never skip testing. Grab a scrap piece of drywall or an old piece of cardboard. Try your chalk, tape, or marker. Paint over it. Wait 24 hours. See what disappears, what bleeds, what stains.Every wall is different. Textured plaster? Chalk won’t stick well. Smooth painted wall? Tape might lift old paint. Know your surface before you commit.
Drawing on walls before painting isn’t about being artistic. It’s about being smart. The tools you choose don’t need to be expensive. They just need to be right for the job. Get that step right, and your paint job won’t just look good-it’ll last.
Can I use regular pencil on walls before painting?
Yes, but only if you use a soft lead pencil (2B or 4B). Hard pencils (like 2H) won’t show up well on textured walls. Soft lead marks clearly and wipes off easily with a damp cloth or sponge. Avoid pressing too hard-deep grooves can show through paint. Always test on a hidden spot first.
Is chalk line messy?
Chalk lines can be messy if you’re not careful, but the mess is temporary. The powder brushes off easily with a dry cloth or vacuum. It doesn’t stain drywall. To reduce dust, snap the line over a drop cloth or outside the room. Use colored chalk (blue or white) instead of red or black-they’re less likely to leave residue.
What’s better for stripes: painter’s tape or freehand?
Painter’s tape is always better for stripes. Freehand lines almost always wobble, even for experienced painters. Tape gives you a physical barrier that stops paint from bleeding. Use high-quality tape like FrogTape, press it down firmly with a credit card, and paint over it slowly. Let the paint dry for 1-2 hours before removing the tape.
Can I use a laser level to draw on walls?
A laser level won’t draw a visible line on the wall-it just projects a dot or line in the air. You can use it to find perfect horizontal or vertical reference points, then mark those spots with a pencil or chalk. It’s great for aligning multiple walls or ceilings, but you still need a physical marking tool to create the actual guide.
Do I need to prime after marking?
Priming isn’t required just because you marked the wall. But if you used a pencil or chalk and the marks are still visible after painting, that’s a sign your paint isn’t covering well. In that case, apply a primer before your top coat. Primer seals the wall and helps paint hide imperfections. Always prime over bare drywall or patched areas, regardless of marking.